
This tutorial will walk you through the basic steps needed to retouch eyes in your character screenshots. It assumes you have a working knowledge of your graphics program of choice.
I wrote this tutorial using Paint Shop Pro 9, but it can be easily adapted to other programs; the tools I used are very basic.
1. Select your image
Crop out the excess background areas in your chosen image.
This is the shot I'll be using:

2. Zoom in...a LOT
I've reduced my canvas size to 200x100 and set my zoom at 300%. This gives me an uncluttered close-up view of the area I'll be working in.

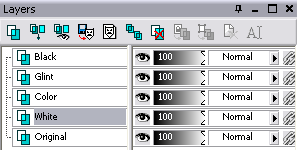
3. Create some new layers
I create 4 new layers on top of my "Original" layer in this order, naming them according to what they will contain.
4. Set up your Paint Brush
Press "B" to bring up your Paint Brush tool. These are the settings I'll be using for all of the painting in this tutorial:

5. Paint the "White" layer
With the "White" layer active and using the brush settings above, make a couple of passes in the white of the eye using pure white (Hex #ffffff, RGB 255/255/255) as your foreground color.
I usually make the second pass smaller than the first, making the central areas of the white of the eye brighter than the edges. Don't overpaint; no one's eyes are pure white all over!

7. Pick your eye color
Select one of the dark colors from your character's eye using the Dropper Tool ("E"). Make sure that it's in the family of your character's natural eye color, unless your goal is to totally change the color.

This is the color I've selected for this image, a dark shade of purple:
7. Paint the "Color" layer
With the "Color" layer active and using the brush settings above, make several passes in the colored portion of the eye using the color you picked as your foreground color.
You can make as many passes as you feel you need to. Since we're going to be altering this layer, don't worry too much about overpainting. Just try to stay in the lines! :)

8. Lighten the "Color" layer
Press "L" to bring up your Lighten/Darken Brush tool. I'm using these settings:

Make one or two passes in the center of the colored area, lightening the middle portion of the iris. We want to leave darker areas close to the pupil and the white of the eye.

9. Paint the "Glint" layer
With the "Glint" layer active and using the brush settings above, make a small dot in the colored portion of the eye using pure white (Hex #ffffff, RGB 255/255/255) as your foreground color. You can make several passes to make the glint brighter.
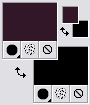
Be mindful of where your light source is coming from and place the glint on that side of the pupil. If your light source is in front of your character's face, place the glint on the side of the pupil nearest the viewer. (For instance, if your character is facing left, place the glint on the right side of the pupil as illustrated below.)

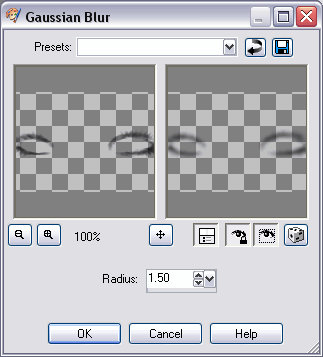
If your glint seems a bit harsh, applying a subtle Gaussian Blur ("Adjust" > "Blur" > "Gaussian Blur") will help soften it up.

10. Soften the "Original" layer
Press "J" to bring up your Dodge tool, then select the Soften tool. I'm using these settings:

With the "Original" layer active, soften the edges of the eyes and the eyelashes.

11. Paint the "Black" layer
With the "Black" layer active and using the brush settings above, darken the base of the lashes around the eye using pure black (Hex #000000, RGB 0/0/0) as your foreground color. You can make several passes to make the area darker.
Make the painted areas narrow toward the inner corner of the eye and thick toward the outer corner.

12. Smudge and blur the "Black" layer
Press "J" to bring up your Dodge tool, then select the Smudge tool. I'm using these settings:

Using short strokes, smudge some lashes in. Remember that lashes radiate away from the pupil and that they have a slight curve.

Apply a Gaussian Blur to soften; you may need to adjust the settings to suit your image.
13. All done!
Here are my new eyes:

The full image:

Before and after:
