
This tutorial will walk you through the basic steps needed to bring out the shine in your character's hair in screenshots. It assumes you have a working knowledge of your graphics program of choice.
I wrote this tutorial using Paint Shop Pro 9, but it can be easily adapted to other programs; the tools I used are very basic.
1. Select your image
I'll be using two shots for this tutorial, one with dark hair and one with light hair:


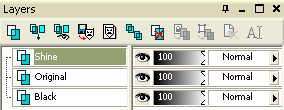
2. Set up your layers
I've already cut my character out of my screenshot so that it has a transparent background. I named this layer "Original.".
I created a new layer named "Black," moved it below my "Original" layer, and filled it with black (#000000) using my Flood Fill Tool ("F").
I created another new layer on top of my "Original" layer named "Shine 1." (We can add more "Shine" layers later, if necessary.)
3. Set up your Paint Brush
Press "B" to bring up your Paint Brush tool. These are the settings I'll be using first:

4. Paint the "Shine 1" layer
With the "Shine 1" layer active and using the brush settings above, make a pass or two. I'm using pure white (Hex #ffffff, RGB 255/255/255), but you can experiment with different colors to achieve different effects.
Notice that hair's natural shine follows the curve of the skull and can originate from more than one point. If there are already subtle highlights in your screenshot, use them as a guideline.
You can paint anywhere you like, since we'll be doing some cleanup later on. :)


5. Intensify the highlights
Working within your existing highlights on the "Shine 1" layer, make several more passes to intensify certain areas.
At this point, you can reduce your brush size to 10 or 5 to give your highlights finer detail:


6. Double it up
Once you feel as though your "Shine 1" layer contains enough shine, duplicate the layer (Shift + "D"), then merge the duplicate layer down into the "Shine 1" layer.


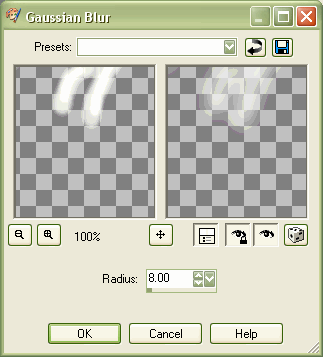
7. Blend and blur!
With the "Shine 1" layer active, change your blend mode to "Dodge" (for dark hair) or "Overlay" (for light hair) and apply a Gaussian Blur ("Adjust" > "Blur" > "Gaussian Blur").
The actual blur settings will depend on the image and your preferences, but I've found that ideal settings for this technique usually fall between 5 and 10.
Feel free to experiment with different blend modes until you find one (or a combination) that suits your image. Don't forget that you can add more "Shine" layers and adjust transparencies if you need to!


In these cases, I used one layer set to "Dodge" at 100% opacity for the dark hair, and two layers set to "Overlay" at 50% opacity for the light hair.
8. A little cleanup
As you can see, the Gaussian Blur has caused some of our highlights to overlap areas of our character's face or armor. Can't have that!
Press "X" to bring up your Eraser tool. I'm using these settings:

Erase the areas where your highlight has gone astray on your character -- the outer edges will be cleaned up next, so no need to bother with them in this step.
Gaussian Blur scatters particles quite a distance away, so you may have a larger area to erase than you think!


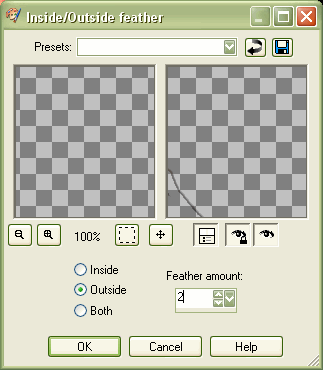
9. A little more cleanup
With the "Original" layer active, use your Magic Wand selection tool to select the non-opaque areas outside your character. I'm using these settings:

The resulting selections:


Feather your selection by 2. I'm using the "Selections" > "Modify" > "Inside/Outside Feather" dialog:
Selecting each of your "Shine" layers in turn, press the "Delete" key on your keyboard.
10. All done!
Here are my shiny new coiffures (before & after):


You can also use this technique for more than just hair:

